Conda environment
本文最后更新于:Sunday, December 20th 2020, 9:56 pm
The blog is derived from the transilation of conda document: https://docs.conda.io/projects/conda/en/latest/
Preface
Package, dependency and environment management for any language—-Python, R, Ruby, Lua, Scala, Java, JavaScript, C/ C++, FORTRAN
对python, R等语言其包,依赖和环境的管理
1、基本功能
- Conda是一个开源包管理系统和环境管理系统,可以运行在Windows, MacOS, Linux上.
- Conda能够快速安装,运行,升级包和包的依赖.
- Conda能轻易地在本地创建,保存和切换环境.
- conda起初是为
Python程序创建,但它能打包和发布(package and distribute)其它语言的软件.
2、应用场景
- Conda作为包管理器,帮助你找到并安装你需要的包。如果您需要一个需要不同版本Python的包,你不需要切换到另一个环境管理器,因为conda也是一个环境管理器(environment manager)。只需要一些命令,你就能建立一个完全独立的环境去运行不同版本的python,同时在正常环境中继续运行您通常版本的Python
- 在conda默认的配置中,conda能够在repo.anaconda.com安装和管理超过7500个包;这些包被Anaconda®构建、评审和维护.
- Conda可以与Travis CI和AppVeyor等持续集成系统相结合,为代码提供频繁的自动化测试。
3、获取Conda
- 通过下载Anaconda®, Miniconda, and Anaconda Repository
- 通过Anaconda Enterprise(收费)
- Conda is also available on conda-forge, a community channel
- You may also get conda on PyPI, but that approach may not be as up to date.
4、Anaconda
anaconda is a graphical user interface that lets you use conda in a web-like interface without having to enter manual commands
anaconda有图形界面,对用户更加友好,但内核还是conda
Getting stated
1、打开命令行
如果是Windows,最好用anaconda prompt,貌似cmd也可;Linux就直接在terminal输命令即可.
如果不是最新的,建议更新到最新
1
2
3
conda --veriosn
4.9.0
conda updata conda如果👆不起作用:出现了RemoveError 使用如下命令:
1
conda update --force-reinstall conda(重新安装)2、创建一个环境
Conda允许您创建包含文件、包及其不与其他环境交互的依赖项的独立环境。
当你开始使用conda,就已经有一个默认的环境
base;但是,您不希望将程序放到基本环境中。创建单独的环境,使您的程序彼此隔离。创建一个新的环境,并在其中安装一个包.
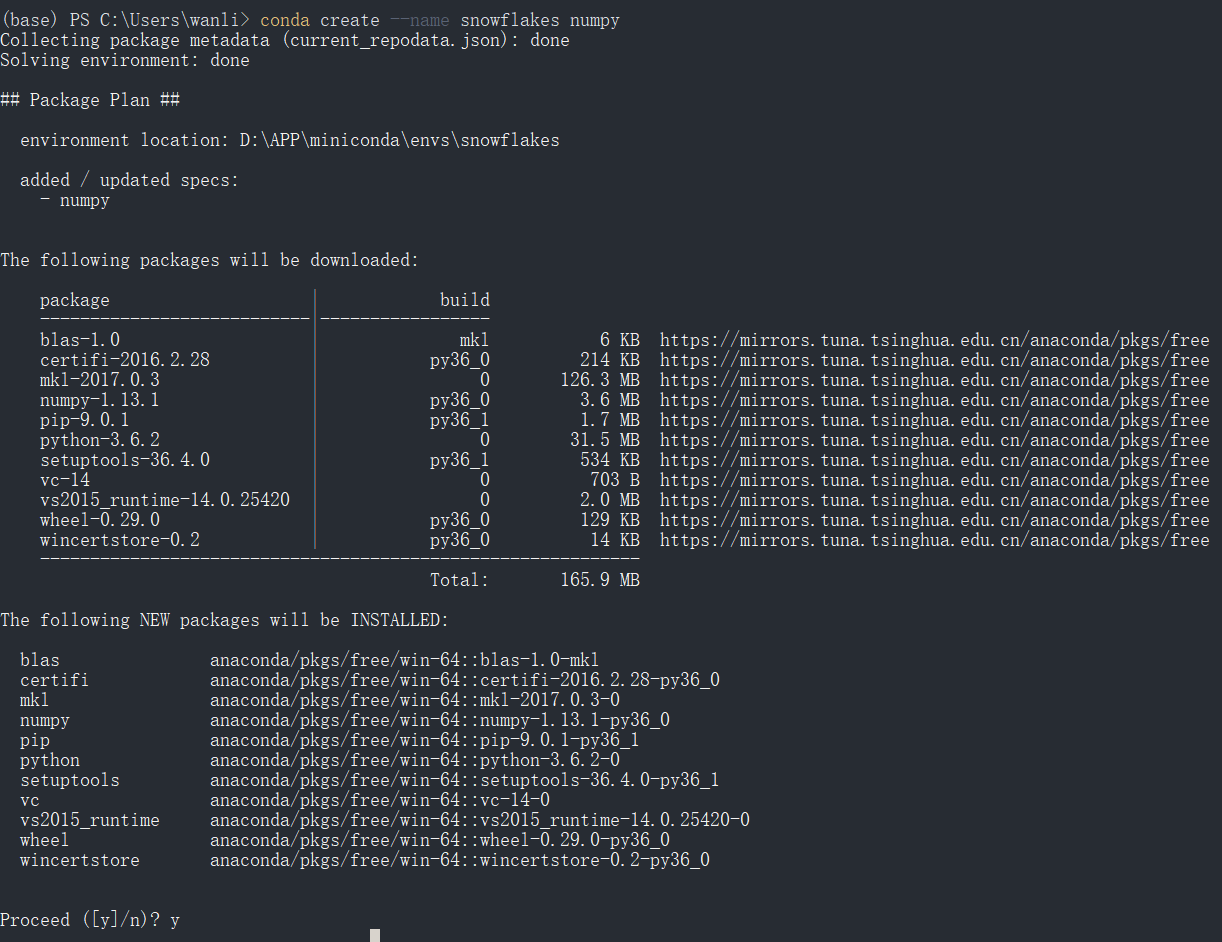
1
conda create --name snowflakes numpyconda随后会检查是否有额外的包(“dependencies”)是
numpy所需,并问你是否要继续:1
Proceed ([y]/n)? y输入”y”并按Enter继续.
切换到刚刚创建的环境
1
2
3
4
5
6
conda info --envs [-e] // 查看已有的环境列表(带*表示当前环境)
# conda environments:
#
base D:\APP\miniconda
py38 D:\APP\miniconda\envs\py38
snowflakes * D:\APP\miniconda\envs\snowflakes1
conda activate snowflakes // 切换到环境snowflakes
修改刚刚创建的环境的名字
1
2
conda create -n new_name --clone old_name
conda remove -n old_name --all
3、管理包
在这部分,你将学会检查你安装了哪些包, 检查哪些包是可以得到的,并查找一个特定的包并安装它。
激活一个环境
检查你没有安装的”beautifulsoup4”是否在Anaconda repository中存在.(你必须联网)
1
conda search beautifulsoup4conda会列出包含那个包名的所有包,这样你就知道它们是可以得到的。
安装此包到当前环境中
1
conda install beautifulsoup4=4.9.1检查新安装的程序是否在这个环境中:
1
conda list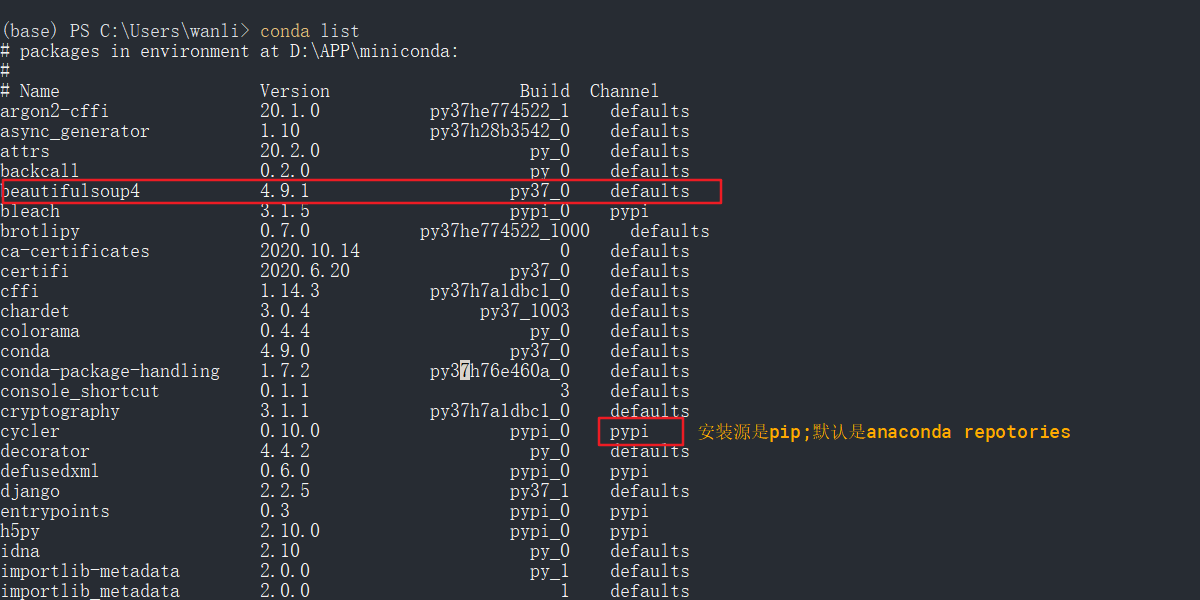
关于使用conda的最重要信息的单页摘要。
conda cheat sheet PDF (1 MB)
Installation
最快的安装方法是:安装Miniconda(400MB)
它是免费的conda最小安装包
仅仅包含
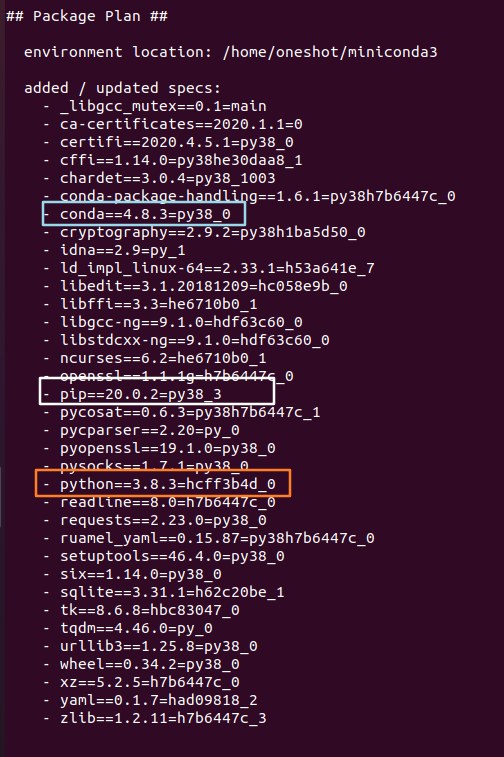
conda,Python,packages they depend on,还有一些非常有用的包(包括pip, zlib等等).需要使用
conda install命令从Anaconda repository安装额外的7500+包(anaconda直接安装好)Miniconda是一个Python发行版,它可以使安装Python变得又快又容易,甚至对新用户也是如此。
note:你没有必要为了使用conda去卸载掉你系统中原先的python和相应的包.
我们只需要正常安装miniconda,并让安装程序将conda installation of Python添加到PATH环境变量中.没有必要设置PYTHONPATH环境变量。
for windos:
安装包下载地址:https://docs.conda.io/en/latest/miniconda.html#windows-installers
for linux
- 使用脚本
2
3
4
5wget https://repo.anaconda.com/miniconda/Miniconda3-latest-Linux-x86_64.sh // 获取安装脚本
echo "<sha-hash> *filename" | shasum -a 256 -c // 检测文件完整性
echo "879457af6a0bf5b34b48c12de31d4df0ee2f06a8e68768e5758c3293b2daf688 *Miniconda3-latest-Linux-x86_64.sh" | sha256sum -c
Miniconda3-latest-Linux-x86_64.sh: OK // 完整性正常
bash Miniconda3-latest-Linux-x86_64.sh // 安装脚本
Managing channels
Conda channels are the locations where packages are stored. They serve as the base for hosting and managing packages. Conda packages are downloaded from remote channels, which are URLs to directories containing conda packages. The conda command searches a default set of channels and packages are automatically downloaded and updated from https://repo.anaconda.com/pkgs/
Conda通道是存放包的位置;不同的通道可以有相同的包,所以conda必须处理这些通道冲突。
Conda列出从所有通道收集到的具有相同名称的包,并按照如下方式处理它们:
- 按通道优先级排序
- 再按版本号排序;
- 再按构建号排序;
- 安装排序列表中满足安装规范的第一个包。
- channelA::numpy-1.13_1 > channelA::numpy-1.12.1_1 > channelA::numpy-1.12.1_0 > channelB::numpy-1.13_1(如果打开了严格通道排序,那么channelB的包就不会在此列表中)
1 | |
添加清华的channel(将下面代码复制到.condarc文件中):
1 | |
默认
channel_alias为:https://repo.anaconda.com/pkgs/通常,
default_channels指向repo.anaconda.com存储库中的几个通道,但是如果定义了default_channels,它将设置默认通道的新列表。这对airgapped和企业安装非常有用。为了确保所有的用户从内部部署的仓库拉取包,管理员可以设置👆两个参数。
channel_alias: 在以后你指定channel不是url时,会加上这个前缀如果要下载的包清华源没有,在anoconda的存储库中,可以在
custom_channel加上相应的通道1
2
3
4
5
6
7peterjc123: https://conda.anaconda.org
// 简写为
conda install -c peterjc123 vc vs2017_runtime
// 否则要写全
conda install --channel https://conda.anaconda.org/peterjc123 vc vs2017_runtime
// 也可以写成
conda install -c defaults https://conda.anaconda.org/peterjc123 vc vs2017_runtime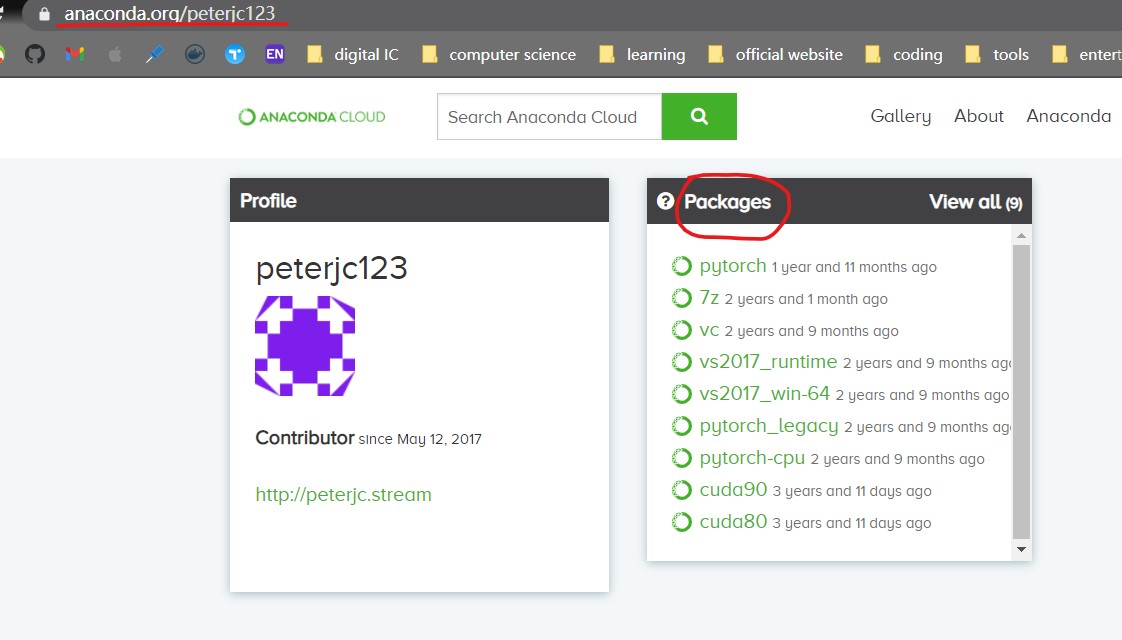
本博客所有文章除特别声明外,均采用 CC BY-SA 3.0协议 。转载请注明出处!